Unusual wafers

Lesson 11

Learn tsmap

Learn tsmap · 11 Unusual wafers

In this lesson

Not every wafer is a neat circle of positioned dies with one result each. This lesson covers the awkward cases: wafers that are mostly empty, wafers with no positions, dies probed more than once, and data the tester recorded wrongly.

  • Read multi-project wafers and wafers with missing positions
  • Set the reticle, diameter and edge exclusion
  • Handle clamped values and repeated dies
Learn tsmap · 11 Unusual wafers

Layouts

Learn tsmap · 11 Unusual wafers

A multi-project wafer

A multi-project wafer shares one wafer between several products. Each reticle holds only a few of one product's dies, so the map is mostly empty and every die is tiny. This is MPW-LOT-08.

The multi-project wafer map, mostly empty

Learn tsmap · 11 Unusual wafers

Compact layout

tsmap can tidy this up for you. When the occupied columns and rows repeat at a regular pitch, Overlays offers Compact layout and Layout diagnostics at the top.

The Overlays menu with Compact layout and Layout diagnostics

Learn tsmap · 11 Unusual wafers

Compact

In the compact layout, empty rows and columns are removed and each group of dies is outlined. Every die is still counted, so yield and findings do not change, and a die's tooltip keeps its original coordinates.

The three wafers in the compact layout

Learn tsmap · 11 Unusual wafers

Layout diagnostics

If a layout is not recognised as you expect, this window shows what the detector saw: counts and scores only, with no positions, bins or wafer names, so nothing about your data leaves with it. Use Copy or Save as file, then send the result to whoever supports tsmap.

The Layout diagnostics window

Learn tsmap · 11 Unusual wafers

Missing positions

Learn tsmap · 11 Unusual wafers

Three kinds of wafer

In the lot COORDLESS-LOT-01, W01 has an X/Y position for every die. W02 is mixed: some dies have results but no X/Y position. W03 has results for its dies but no X/Y positions at all, so there is nowhere to draw them on a map.

The lot's three wafers

Learn tsmap · 11 Unusual wafers

A mixed wafer

A mixed wafer draws the dies that have positions, so the map is true to what is known. A footer counts the rest; click it to see them.

W02 with its dies-without-position footer outlined

Learn tsmap · 11 Unusual wafers

No positions at all

With no positions there is no map to draw, so the card shows a summary instead: a bin breakdown in the bin colour modes, or a histogram when colouring by a test value. View die list shows every die.

W03's summary card, with View die list outlined

Learn tsmap · 11 Unusual wafers

The die list

The die list has a row for every die, with its position (blank here), site, bins and every test value. Export CSV saves it, and View chart switches back.

W03's die list

Learn tsmap · 11 Unusual wafers

What it changes

Layout findings (edge ring, quadrants, clusters) use only positioned dies, because they need to know where a die is. Yield, bin counts and test statistics include every die, so no result is lost.

More in the user guide

Learn tsmap · 11 Unusual wafers

Repeats and sites

Learn tsmap · 11 Unusual wafers

Retests

A die is sometimes probed again after it fails, to see whether the failure was real. Every probe is a result, but the die needs only one.

  • When the same die position appears more than once, one result has to stand for the die
  • By default it is the last
  • The die's tooltip says how often it was probed, and the log notes repeated dies
Learn tsmap · 11 Unusual wafers

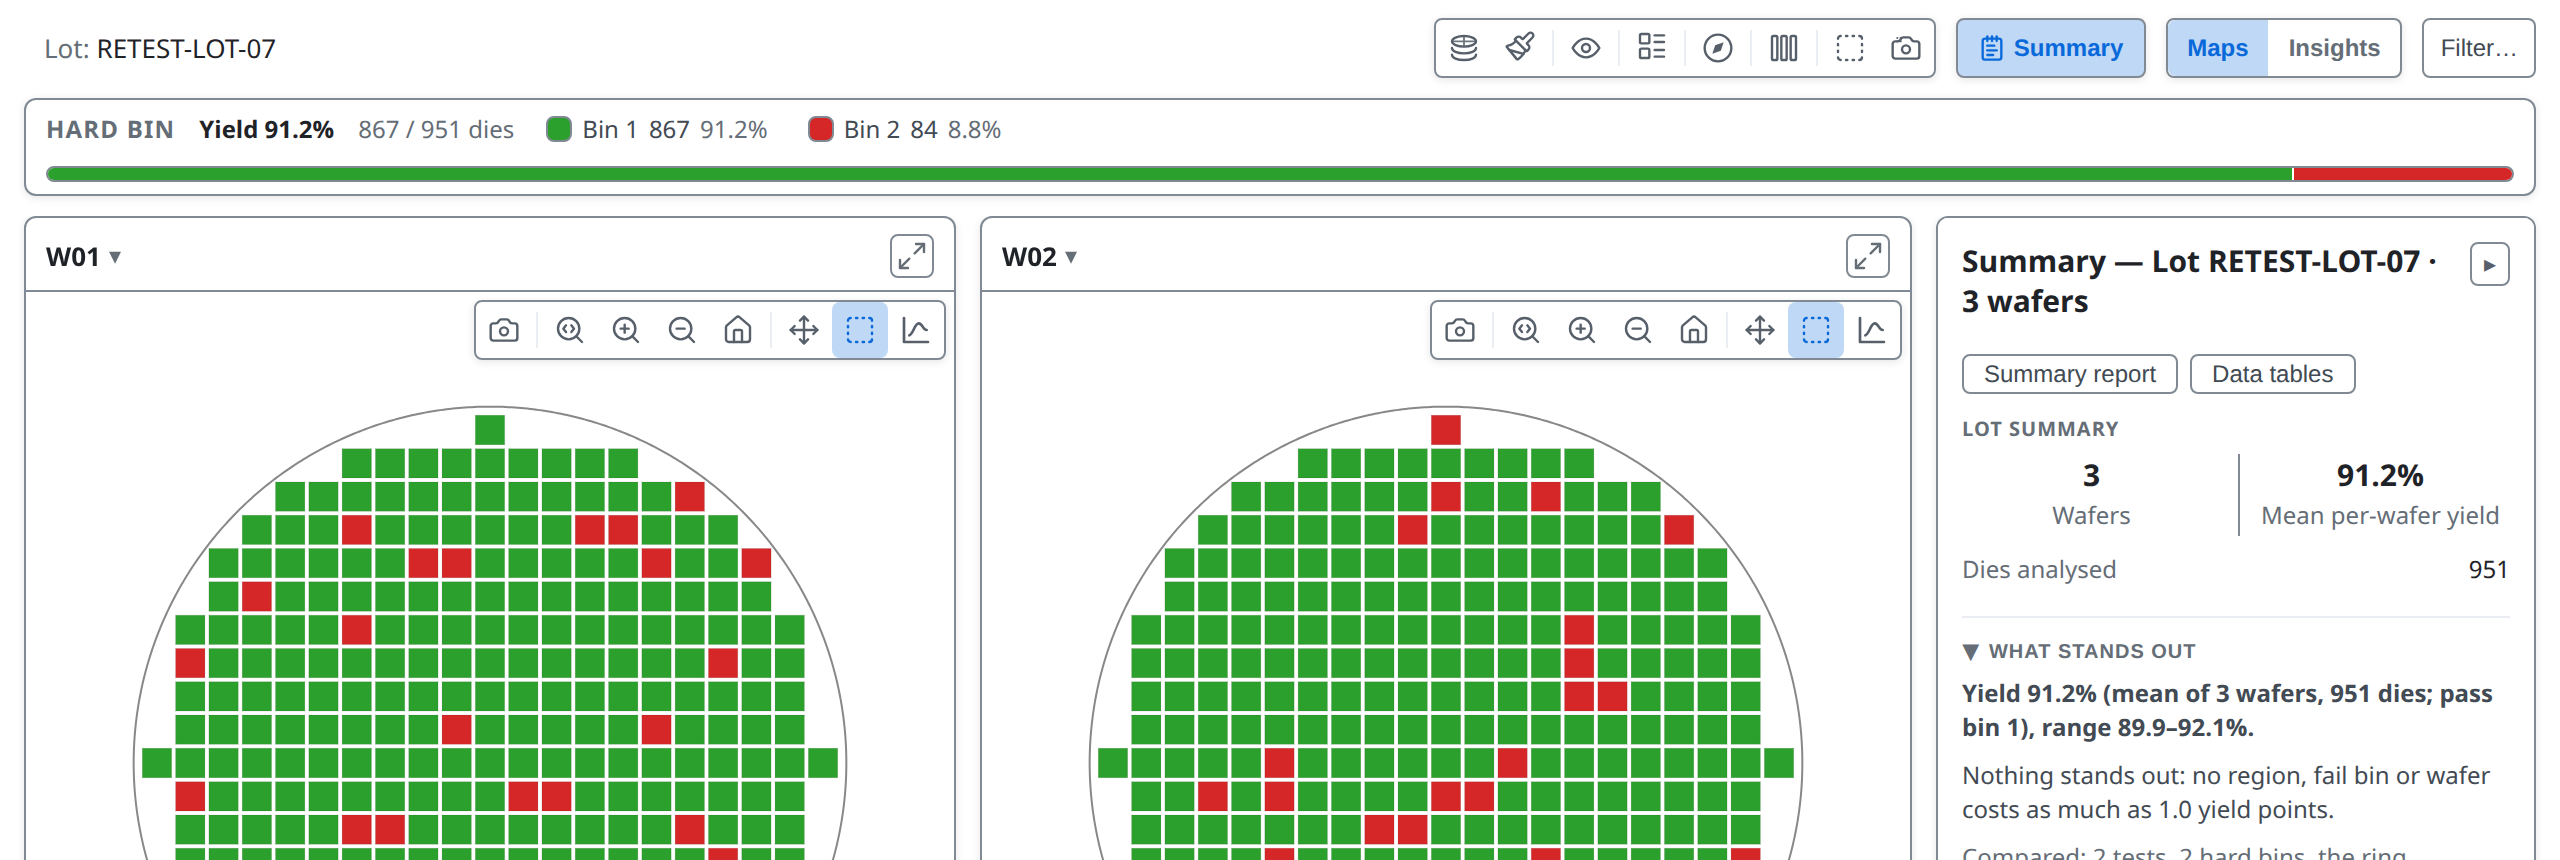
A lot with retests

RETEST-LOT-07 has:

  • a second pass over most failing dies
  • a re-probe of a few passing ones
  • a third probe of some
Learn tsmap · 11 Unusual wafers

Where the retests are

When a lot has dies probed more than once, the Overview gains a Re-probed dies card: the share of dies re-probed in each ring of each wafer.

The Re-probed dies card: rings down the side, wafers across, each cell the share re-probed

Learn tsmap · 11 Unusual wafers

Reading the retests

Look for where the retests concentrate.

  • A bright cell is a ring where retests cluster
  • That can mean a contact problem at that radius, rather than bad dies
  • Re-probed is also a field you can plot (lesson 10)
Learn tsmap · 11 Unusual wafers

Setup ▾ → Retests…

The probe you choose changes the yield.

  • Last or First: the probe by its place in the file
  • Best: a pass over a fail, then the lower hard bin
  • Worst: a fail over a pass, then the higher hard bin

The Retests window

Learn tsmap · 11 Unusual wafers

A result that replaces another

A result the tester marked as replacing an earlier one always counts, whichever choice you make.

Learn tsmap · 11 Unusual wafers

One choice, every figure

The chosen result is the die on the map and in the yield, findings, Insights, tables and exports, so every figure agrees. RETEST-LOT-07 yields 86.1% with the last result, 79.2% with the first, 91.2% with the best and 75.8% with the worst.

RETEST-LOT-07 with the best result: yield

Learn tsmap · 11 Unusual wafers

The same wafer twice

If one file holds the same wafer more than once, a column that tells the passes apart (a temperature, say) makes each pass its own map, and the log names the column. With nothing to tell them apart the repeats are treated as retests.

Learn tsmap · 11 Unusual wafers

Test site

Sites are a different kind of repeat, and are not retests.

  • Many testers probe several dies at the same time, each through its own numbered site (1, 2, 3…)
  • STDF and ATDF record each die's site. In a CSV, JSON or Parquet file, map the site-number column to Test site
  • All sites share one wafer map; the tooltip shows a die's site, the findings compare sites, and a plot can be split by site
Learn tsmap · 11 Unusual wafers

Sites are not separate wafers

Subdivide file by this column makes one wafer per value of a column, for files that pack several wafers with no wafer column. Never use it for sites: they share one wafer.

Learn tsmap · 11 Unusual wafers

Geometry and limits

Learn tsmap · 11 Unusual wafers

Reticle…

A reticle is the group of dies exposed in one stepper shot. Defects that repeat in every field point at the mask, so it is worth telling tsmap the reticle's size. Files don't record it, so enter its width and height in dies. Set the corner die only if a field doesn't start at (0, 0).

The Reticle window

Learn tsmap · 11 Unusual wafers

A field of 4 by 3

Here the field is 4 dies wide and 3 high. Apply takes effect at once. Clear removes the reticle. The reticle applies to every wafer and is remembered.

The Reticle window with 4 by 3 entered

Learn tsmap · 11 Unusual wafers

The field grid

  • The grid is drawn and the tooltip gives each die's cell
  • Findings look for a cell that fails in every field
  • Reticle cell yield joins the Summary and the Overview: low everywhere points at the mask

The three wafers with the reticle grid drawn

Learn tsmap · 11 Unusual wafers

Reticle grid

Overlays ▾ → Reticle grid hides or shows it. Plots gain two fields: Reticle cell, a die's place inside the field, and Reticle shot, which exposure it came from.

The Overlays menu with Reticle grid ticked

Learn tsmap · 11 Unusual wafers

Diameter and edge exclusion

tsmap works out the wafer's size from its dies. When there are too few dies to do that, enter the diameter.

  • Edge exclusion: a band at the rim, in mm, left out of yield and drawn dimmed
  • The band needs a diameter first

The Diameter and edge exclusion window

Learn tsmap · 11 Unusual wafers

A band at the edge

With 300 mm and 10 mm entered, dies within 10 mm of the edge are left out of yield and drawn dimmed. Both values are remembered.

The wafers with an edge exclusion band

Learn tsmap · 11 Unusual wafers

Exclude values outside limits…

Sometimes a number in the data is not a measurement.

  • A tester out of range records its rail, such as a compliance clamp, not a reading
  • Values outside a test's validity limits count as missing: grey, and out of the statistics

The Exclude values outside limits window

Learn tsmap · 11 Unusual wafers

Other limits to exclude by

Instead of validity limits, you can choose the spec limits or the test limits, or switch the exclusion Off.

Learn tsmap · 11 Unusual wafers

Nothing is hidden

The tooltip on a grey die names the excluded value, and the Summary panel's Test Values table shows an Excl. column. Bins and the tester's pass or fail are unchanged, so yield is the same.

Learn tsmap · 11 Unusual wafers

Try it yourself

  1. Open the multi-project wafer, Continue →, then Overlays → Compact layout
  2. Open the wafers without positions: open W03's View die list
  3. Open the clamped readings and switch Exclude values outside limits… between Validity limits and Off
  4. Open the retested lot, Continue →, then try each choice in Setup ▾ → Retests… and watch the yield
  5. On the sample lot, Setup ▾ → Reticle…, enter 4 by 3 and Apply
Learn tsmap · 11 Unusual wafers

Recap

  • Compact layout shows multi-project wafers at a readable size
  • Wafers with missing positions keep every die in the numbers
  • Retests… chooses which probe stands for a die tested more than once
  • Reticle… and Diameter & edge exclusion… supply what the file does not say, and Exclude values outside limits… removes tester clamp values

The last lesson covers automation.

More in the user guide

Learn tsmap · 11 Unusual wafers

Next lesson

12 · Automation and integration →

The command line, links, and definitions files.
Learn tsmap · 11 Unusual wafers